Monday, May 26, 2014

developing a cell vocabulary + cat lab assistants

Histological slides of mouse fetuses in the collection at CELLCentral, UWA.
Henry is a cat at the house where I am staying, and he waits for me downstairs in the kitchen every morning. He's an empathetic, intelligent cat and even though I don't like cats, I like Henry. I like Henry even more now because he has assisted my research and may be the key to my lab success, in the end. Henry called to everyone in the house last week, late one evening, with some god-awful yowling and once he had everyone's attention, proudly displayed the rat he'd just caught. That very rat accompanied me to the lab the next morning, tightly bound in a plastic container. I sliced it open in the lab and removed its femur bones, which I then extracted the marrow from. It just so happens that I was given a protocol (lab recipe) for isolating osteoblasts from rat bone marrow. I didn't have to use any poor lab rats - this one was a gift from a cat on a mission. This protocol was extremely complex, and I was in the lab alone all day, since Ionat had called in sick. There was nobody around to help me, and so I took a big breath and did the entire thing on my own. I've never cut open a rat before. I was terrified that I'd get in trouble for bringing in a dirty old rat from the outdoors, so I worked quickly to get the bones out and then wrap up the evidence in a bag destined for the biological waste bin. I mastered the art of dressing and removing scalpel blades, since I had to use several on the rat. I asked around for the right kind of pitre dishes and some syringes with different sized needles. I asked about the chemicals listed in the protocol so that I'd have some vague idea of what I was doing. Then I prepared the fresh bones by washing them with ethanol and PBS, then with only two hands (mine), I somehow managed to balance the bones with super fine sterile tweezers and clip the ends off both ends of the bone, attach the needles to the syringes and fill them with PBS, which I then shot through the bones to flush the marrow out into tubes. It was a tiny bit. Then I took my tubes upstairs to the centrifuge, spun them at 1800x/minute and then went back downstairs and pipetted out the fluid until I was down to the tiny bit of marrow at the bottom of the tube. Then I prepared dishes with the right chemicals and plated all the marrow cells and stowed them away in the incubator for the weekend. I felt truly accomplished after all of this. This lady has lab skillz.

Little rat femurs.
My microscopy skills have also been improving slowly, as I begin to develop a cell vocabulary. It's really difficult to look for life in a pitre dish when you don't know what you're looking for. So, I can identify red blood cells very easily now, as well as fat cells, air bubbles and crystals. I still have trouble sometimes with seeing my C2C12s, and still have yet to experience a living osteoblast or any other bone cell. I can also identify dead cells, dividing cells and non-cell detritus in the dish. These might seem like simple things but they really aren't. I've had many false alarms because I got exciting by something, only to discover it was just... an air bubble. Or a dying cell. There were some possible living cells in my cultures at the end of the week last week, confirmed as possibly something by Stuart.

I sent the microscopic digital images I captured on Thursday to an artist collaborator of mine in Montreal, Paloma Dawkins, who is now in the process of drawing and animating them. I'm really excited to see what she'll produce from the images!! Part of the challenge when working within the realm of science and biotechnology is to not just get totally seduced by the technology and lose part of the creativity of the work. So, these little animations are one way to aestheticize the research in a creative manner. Paloma and I worked together last year with great results, so I have every confidence in her. Here are some of the images she's working with and some explanations for what's going on:

C2C12 (Mighty Mouse) cells.

More C2C12s, same dish, different location.
Aren't they beautiful? This is how they looked last week, but this week they're totally different because they have started to differentiate. The cells with the very bright auras are either about to divide or have just divided (in the case of two next to each other, which you can see in the bottom image). Cells that aren't in the process of division are stuck down to the dish and flattened out, trying to network with each other and their auras aren't as bright. You can see them reaching out, stretching long tendrils towards each other. The circles in the centre of the cells are their nuclei.

THESE are the beautiful universes of bone marrow (from a cow femur):

All of the tiny white and blue dots are red blood cells. The white ones are alive, the blue ones are asphyxiating and the ones with black dots in the centre are fully dying. Red blood cells have a short life span and no nucleus. The large cloudy stuff is fat, or oil from burst fat cells. The larger things with auras are what are possibly viable bone cells. Keep your fingers crossed for me. Stuart will look at them this week and tell me what they really are.


These are the images that Paloma is animating. In this bottom image, you can see nuclei in the cells, which is a good sign (the dark pepper specks inside the cell). This week I'll check the cultures again to see what's still alive. Guaranteed there will be a lot less red blood cells. Will there still be anything else alive? We shall see.

One of my cultures today was full of beautiful growing crystals! This is amazing again because I was growing crystals on hog gut last semester as part of a biomimetic project. All of my lab work is validating everything that I had been working on intuitively before, in my studio/lab. I hope the crystals last long enough for me to photograph them.

Lastly, I began the process of decellularization last week as well, on hog gut. I cut open the intestine, stretched it out into sheets that I pinned down to a styrofoam base and added an enzyme called Trypsin to dissolve all of the cells. It was beautiful. Trypsin is pink, so it coloured the gut until all of the cells were washed away. It's completely white and transparent now. More pics of that later.


Tuesday, May 20, 2014

counting + freezing down, plus the durability of the hog gut matrix

Oh, just a cow head in formaldehyde in the lab. No biggie.
Looking for viable cells in a primary cell culture is like looking for a planet in the universe that can sustain life. In fact, looking at a cell culture under the microscope and scanning for living cells might as well be looking through a telescope at the stars. So many mysteries. Where is there possibly life?

On Friday, I scanned and scanned... aaaaaaand scanned my culture flasks under the imaging microscope, and found ONLY ONE possible viable cell. This was tragic. Guy Ben-Ary trained me in using the very posh digital microscope, and also informed me that cells are social creatures - they like to be able to reach out and touch other cells, make a colony. He said without other like cells around, they will die. There were plenty of red blood cells, in various stages of life and death: bright ones still alive, blue ones in a state of asphyxiation (dying) and dead black ones. Then, one larger round one, a viable cell! Only, it was a poor, lonely cell, looking miserable. Its centre was blackening and it was possibly going to just die. I was crestfallen.

The success is that my cultures have no contamination. This is a big deal. Especially since I'm a noob in the lab. And, especially since I was digging in a messy (non-sterile) bone for these cells. So, I should be happy about that.

Today when I looked again, I saw things that looked potentially exciting. Alas, they were air bubbles. That's what Ionat told me, anyway. Microscopic air bubbles. I then went through a process of removing all of the media (bone soup or DMEM, whatever each flask had) and replacing it with new. The old media (junk media) was stored in new, sterile flasks and returned to the incubator, just in case at some point something unexpected decides to grow. The fresh media in the old flasks was likewise then returned to the incubator on top of the flask with its old media. I looked again through the microscope, hunting for life. Nothing. I will dig out another bone from the butcher tomorrow and try again with new cultures. I might also get to have some bone cancer cells from the freezer if Stuart can find them. Now, THOSE will grow.

Today I began decellularization and freezing down cells. After speaking with a surgeon this weekend about what tissues might have the strongest extracellular matrix (a.k.a. collagen), I now know that pig intestine is my best bet for decellularization. He tells me that pig tissue is by far the strongest, not to mention the closest to human. Also, on top of that, veins, arteries and bowels have the strongest tissue matrix. This is extremely interesting, given that I was doing my preliminary research with hog gut through a biomimetic inquiry into the process of tissue engineering. Somehow I intuitively knew that hog gut was the best material to work with. But, as with so many things in that project, intuition was always the best guide. This is what I consider listening to the haptic intelligence of my body: it tells me things on a subtle level that I can't explain at the time, but that later prove to be scientifically accurate. Anyway, I secured a good amount of hog gut from the butcher and away we went.

The cells that I froze down were half of the C2C12s that I began in my first day at the lab. Cells just keep multiplying, so freezing them down is the only way to keep them to use them, but also stop them from continuing to proliferate.

Here are my new protocols that were put into play today in the lab. Yes, I counted cells. How did I keep track? With a handheld clicker, while I stared through the microscope.

Hog gut stretched over sterile vials. Stage I.
PROTOCOL for Decellularization using trypsin
  1. Wash tissue in ultrapure H2O overnight (in beaker/container) on a rocker @ 4˚C
  2. Incubate tissue in 0.05% trypsin with EDTA for 30-60 mins @37˚C
  3. Wash the tissue briefly with ultrapure H2O to remove the trypsin
  4. Neutralize the trypsin by incubating the tissue in culture media (e.g. DMEM) containing 10% FBS at RT, 2x30 min (can leave O/N at 4˚C)
  5. Wash the tissue in 1% Triton-X-100 made up in ultrapure H2O for 1-2 days, changing the wash buffer 2x per day
  6. Wash the tissue in ultrapure H2O for another day
Notes:
  • Standard trypsin-EDTA used to dissociate cells from tissue culture plastic: http://products.invitrogen.com/ivgn/product/25300062
  • Timing is flexible - originally the TX-100 wash was done for 5 days and rinsed in H2O for several days at a time, but didn't seem to make much difference
  • The unused intestine gets frozen in a tube for later.
  • To check how well the decellularization has worked, check sections with DAPI

PROTOCOL for Counting cells
  1. May need to dilute cell suspension
  2. Prepare the haemocytometer:
    • Make sure the slide and cover slip is clean. Use EtOH if necessary.
    • Moisten edges of cover slip and apply to grid surface of slide.
  3. Touch drop of cell suspension (recently stirred) onto edge of cover slip at the surface of the slide.
  4. Capillarity will draw a volume of cell suspension between slide and cover slip. Do not allow volume to spill into grooves flanking the grid on the slide. The cover slip must be totally covered inside, however.
  5. Inspect under microscope. If cells are really clumpy, you will need to break up the clumps and restart. Clumps of 3-10 cells are OK as long as you can count them easily. If not, dilute suspension. 
  6. Count the cells in the grid of 25 small squares (each of which is itself divided into 16 smaller squares). 
  7. Count cells that touch only two border lines as being in the grid. Ignore cells on the border of the other two lines.
  8. Make an average count (use both grids) and note dilution factor. 
  9. The volume of suspension contained between the slide and cover slip within the 25 square grid is 1x10[-4]ml (according to the dimensions of each square and the distance between slide and cover slip). 
  10. Multiply the average number of cells by 1x10[4] and this will give you a cell number/ml of suspension. Take into account any dilution. 
    • For example, if you count 150 cells in the grid specified, then your cell count is 150x10[4] = 1.5x10[6] cells per ml.

My C2C12s ready for the sleep of deep freeze.
PROTOCOL for Freezing down cells
  1. Obtain cell count using trypsinisation.
  2. Spin or dilute cells to give a count of 1.5 million/ml medium.
  3. Label vials with cell type, passage number, date, initials, number of cells.
  4. Add 100µl DMSO to each vial.
  5. Add equal volume of neat FCS (or NCS depending on cell type) and mix well.
  6. Add 0.8ml cell suspension per vial and mix well.
  7. IMMEDIATELY start the freezing process which should be relatively slow by placing vials on dry ice covered with tissue lagging for 1hr then transferring to liquid nitrogen or -80˚ freezer or placing in heavily lagged container directly into -80˚ freezer.

Oh, by Friday I will have microscopic images.

Wednesday, May 14, 2014

bone saw + establishing the bureau of microscopic investigation

Stuart informed me today that I should be keeping a lab book of my protocols, experiments and results, and so this research blog will serve as a type of Lab Book. In fact, this gives me ideas for a more creative presentation of my research report in the end: to organize and aestheticize it like a Lab Book.

For starters, I've created these lab log cards, based on traditional forensic/police cards. The invention of the Bureau of Microscopic Investigation is mine:


These cards will be completed each time I work in the lab and will be included in a final 'lab book' report. 

Photo by Moe Beitiks.
Yesterday I borrowed the electric bone saw from the morgue and used it to cut a huge cow bone in half, so that I could scrape out the bone marrow and some of the compact bone tissue. My tour of the morgue was interesting, including sightings of various dismembered human body parts on steel stretcher tables, some visible only as heaps under sheets and some open for plain viewing. I did see a human head, with sections removed, including the skin. Once I had my bone saw in hand, I was quickly off to the lab to do some living science.

Taking cells directly from a fresh, raw bone versus buying a cell line from a laboratory supply company is called primary sourcing. Primary sourcing is considerably cheaper (most cell lines sell for around $500) albeit fraught with problems. Contamination is one common problem. If a cell culture is contaminated with bacteria, fungus, etc it becomes unusable. I am happy to report, after having Stuart inspect my new bone cell cultures, that they are not contaminated. However, he says he doesn't really see many viable cells, either. That means all of the cells I did get from the marrow have either died or are still alive but not adhering to the flask, meaning they won't be able to grow and will die. I still have hope, though. He says it's hard to tell for at least a few days. I only gave mine 24 hours before I was inspecting the hell out of them. I saw many interesting things under the microscope, including a whole bunch of little tiny black dots, which seemed to have an aura. I was afraid that these were bacteria, but it turns out, Stuart tells me, they are red blood cells. Millions of red blood cells. He says they will eventually all die because they don't have much of a life cycle. So, in the next couple of days, I'll hope for some viable bone cells to adhere themselves to the flask, and then I can grow many from them.

Photo by Moe Beitiks.

I was very lucky to have no contamination, considering I was digging in a dirty old bone after sawing through it with an old morgue bone saw, and it was my first time really getting under the hood in the lab. Burning bone stinks of burning hair, by the way. Ionat was having a hard time with the smell. Stuart told me that I should always test the cell medium (DMEM) for contamination before putting a new culture in it. This means putting the plain medium in a dish by itself for a few days in the incubator to see if any bacteria grows in it. If it does, the medium is contaminated and needs to be filtered before being used. I'm going to do that today before I leave, though it looks like I don't have contamination anyway. However, sometimes contamination can take a few days to show up.

Photo by Moe Beitiks.
Another thing I should have done first, Stuart tells me, is to put the cells not directly into the bone soup that I mixed but instead just directly into plain DMEM. The reason for this is that the bone soup I made is specifically for osteoblast differentiation, meaning I am trying to force the bone cells to become one type of cell (an osteoblast) and if they aren't liking those conditions, the cells will just die. All cells like plain DMEM, so I could just put my primary source culture in that first and just wait and see what grows, then decide if I want to put anything in my precious bone soup.


The eucalyptus bark and the tree that I collected it from.
Last night I gathered eucalyptus bark from the riverside and boiled it in one of Janet's large cauldron-like pots to create my first natural dye bath which I hope to use as a tissue stain.
My eucalyptus dye pot. Kitchen lab!

I asked around today as well, about staining a living culture. Apparently it isn't routinely done - most cultures have to be fixed first with formaldehyde although it is possible with some types of fluorescent stain. I'm specifically interested in using the stains for medicinal purposes, such as with Gentian Violet for its antibacterial properties. It looks like I'm just going to have to go ahead and do some experiments myself with that, because nobody else has used stains for medicine in the living cell cultures.

Here are my new babies in the bone soup, staying warm in the incubator.


Monday, May 12, 2014

biological stains + cell auras

My first bone soup!
I've made my bone soup with Ionat's help, along with the help of different biologists who I had to ask for chemicals and math assistance from: Dr Peter Mark, Research Fellow and Dr Stuart Hodgetts, Research Associate Professor, as well as one of Stuart's PhD students. They generously gave me the micro amounts of steroids (Dexamethasone) and Vitamin C (Ascorbic Acid) needed for the soup. The other bone soup ingredients include antibiotics, blood, sugar and a chemical that helps cells differentiate to osteoblasts. As well, the media (liquid) that is basically the bone soup stock, the DMEM, is formulated to keep the cell cultures healthy by preventing ammonia build-up. That build-up is like cell pee, to put it bluntly. As the cells eat and grow, they also produce ammonia, meaning they pee in their soup. They're kind of like pets in this way. Micro-organism lab pets, and in my case, bone pets.
I'll discover if the soup was properly mixed starting tomorrow when I extract bone cells from the marrow of a fresh bone (from the butcher) and attempt to isolate the osteoblasts. The bone soup is their supper and if they don't like it, I won't get healthy bone growth. Mixing the bone soup was *very* precarious. With some chemicals, the amounts were so small it was like a speck of dust, easily blown onto the floor with a misdirected breath. I had to weigh these chemicals on special, super sensitive scales that could measure in millionths of grams. So it is conceivable that I may not have made the best soup on my first go.

More calculations for bone soup recipe:

1mM Dexamethasone
10nM = 1 x 10[5]
1L (1000 mL) = 1,000,000 µL
so 500mL = 500,000 µL
5µL = 1 m....* in 500mL (*I can't read Peter Mark's writing here)

ß-GlyceroPhosphate (BGP):
for 50mL = 10.8mg for 1mM final concentration
for 500mL = .108mg for 1mM final concentrate
MW is 216.04

***

When I checked on my Mighty Mouse cultures last Friday, I saw the aura around the cells! This edge of light around each living cell was vibrant and clear - I've never seen a cell aura before, and I have looked at C2C12s under a microscope previous to this. Maybe I didn't notice the aura before, but we'll just say that Amber did a good job with her energy transfer. The cell aura indicates that the cells are alive and healthy, their living light on display under the microscope. I was not using a photo imaging microscope so I don't have images yet, but I hope to soon.

***

In my work with bone decalcification, which started on Friday, I've moved from the chemical fixative stage (using Formalin, which is about 40% formaldehyde), to the de-cal stage (using Hydrochloric Acid), to the drying stage (in 70% Ethanol). This means that the fresh bones that I brought from the butcher (chicken wing bones) have already gone through three different chemical processes. They have about another nine chemical processes to go through yet this week before I can cut and use them. I'm working with Mary Lee, the Scientific Officer at CELLCentral lab and Shirley Chang, CELLCentral's Technician.

CELLCentral specializes in Histology, the science of tissue, and I am learning the old school craft of Histology from Mary and Shirley. The process of decalcification is to prepare bone for penetration by a wax support, so that the bone can be sliced at 5 microns thick, applied to glass microscope slides and dyed for viewing under the microscope. WHAT IS TRULY FASCINATING, for me and for all of my fibre arts/ textile friends, is learning that many of the tissue practices involve direct links to textile practices. For example, the dyes used in Histology originated from and are the still the same as textile dyes, including natural dyes like wood, saffron, coffee, indigo, cochineal, India ink, etc. Tissues which take up stains are called chromatic. Chromosomes were so named because of their ability to absorb a violet stain. Collagen sucks up stain really well. We are all colour and light, each of us. You can read more about staining HERE. Some examples of dyes/ stains at my disposal at the CELLCentral lab:

Vital Red Blood Volume, also known as fuchsine, is also a textile dye and is highly toxic. This will stain cell nuclei.
Canada Balsam is actually used as a cement for glass slides, because it dries optically clear. It is also edible.
Gentian Violet, also known as Crystal Violet, has medicinal properties as an antibacterial and antifungal. It isn't a textile dye, but it is used to dye paper, and is a nontoxic stain for DNA. It will also get rid of ringworm, candida and mouth ulcers. It has also been used to develop fingerprints in forensics (which as you may or may not know, is a passion of mine, being a bone woman and all). It's also used to mark skin for body piercings.
Carmine, a.k.a. COCHINEAL, is a natural textile dye made from beetle blood.
Sudan stains like fats, so are good for staining fatty tissue. This originates from a textile dye used to dye leather. It's also used for enhancing fingerprinting, since it likes body oils and grease.
Orcinol is a natural dye that comes from lichens. It is made with ammonia, meaning it used to be made with urine. It's also sold as cudbear paste and is used as a food dye as well. It will stain chromosomes and elastic fibres. It can also dye wool and silk without a mordant, anything from red to purple to blue.
This is also a textile dye used in bio staining. It's used to stain fatty tissue as well. It is toxic and promotes tumours and mutation. Do we want this rubbing off on our skin?
In histology, colour (dye/staining) is used as a diagnostic tool. It isn't simply to produce beautiful coloured images for the microscope, although they ARE stunningly beautiful. Different dyes adhere to different types of tissue. One dye type might show up cartilage primarily, while another might show up specific minerals or cells. This is fascinating to me. When I create my slices of bone that I then adhere (with wax) to glass slides, I can play with different dyes to see what emerges on each slide. Perhaps one slide will be dyed blue, the other with coffee. I'm also going to collect some eucalyptus leaves from the trees on my street and create a dye bath from that, which I will also use on my bone slides. I wonder what tissue type eucalyptus will stain!?


To give an actual colour example of what dyed/stained tissue looks like, I offer for your viewing these macro images I took today (I have a great macro lens on my iPhone) from already existing slides in the histology specimen library that I was able to pick through today and look at under the microscope.

WARNING: these are images of human fetal specimens.

Please keep in mind that they were thoughtfully and respectfully donated to science for the purposes of advancing human health.
They are absolutely stunning and were incredibly touching just to hold in my hand.
Please do not download or reproduce these images in any way. Thanks, dear friends.


Human fetal spine, length-wise.

Human fetal spine, cross-section.
Human fetal hand.
Human fetal foot.

The actual size of the specimens.


You can read up more on histology HERE.
This is a GORGEOUS old book in full downloadable format - my gift to you (click the text to download the beautiful PDF):
Conn, H. J. Biological Stains; A Handbook of the Nature and Uses of the Dyes Employed in the Biological Laboratory. Baltimore, MD: The Williams & Wilkins Company. 1953.

Wednesday, May 7, 2014

cell passage + decalcification ftw

More activities this week: cell passage

Protocol for cell passage (for most cell types*):  ----> I'll unpack this process further below
  1. Add enough warmed 1x trypsin–EDTA solution (see table 1x trypsin–EDTA solution) to cover the monolayer, and rock the flask/dish 4–5 times to coat the monolayer.
  2. Place the flask/dish in a CO2 incubator at 37°C for 1–2 min.
  3. Remove flask/dish from incubator and firmly tap the side of the flask/dish with palm of hand to assist detachment.
  4. If cells have not dislodged, return the flask/dish to the incubator for a few more minutes.
  5. IMPORTANT: Do not leave cells in 1x trypsin–EDTA solution for extended periods of time. Do not force the cells to detach before they are ready to do so, or clumping may occur.
  6. Overly confluent cultures, senescent cells, and some cell lines may be difficult to trypsinize. While increasing the time of trypsin exposure may help to dislodge resistant cells, some cell types are very sensitive to trypsin and extended exposure may result in cell death. In addition, some cell lines will resist this treatment and will produce cell clumps.
  7. Once dislodged, resuspend the cells in growth medium containing serum.
  8. Gently pipet the cells up and down in a syringe with a needle attached to disrupt cell clumps.
  9. If pipetted too vigorously, the cells will become damaged. Ensure that pipetting does not create foam.
  • Separate the liquid evenly into new vessels.
  • Label vessels with cell type, date, researcher name, and passage number.
  • Place vessels in incubator and leave them a couple days to recover.

Using all of the above protocols, I created two new cell cultures today: C2C12s. I'm calling them Mighty Mouse cell cultures, because C2C12s are mouse muscle tissue cells. These two cultures have been named after two of my Cell Parent donors, Peter Steggall and Sonny Assu (photos will come your way once I am able to print them - Peter, I hope to print yours and ship it off to you before I leave Australia, and Sonny, I'll print and deliver yours to you once I'm back in Canada). These cell cultures will also receive quantum mechanical psychoenergetic transfer from an energy worker/ artist (and former student of mine), Amber Friedman of Blue Lotus Wholistic Healing in Powell River, BC. This should make them even mightier Mighty Mouse muscle cells! Amber will be building crystal grids to transfer strength-building energy. I'll have more information from her in the form of a report after the work is complete. This work complements the work of the professor I'm working with in the lab right now, Ionat Zurr. Ionat is working with the C2C12s on a special miniature laboratory device that she ordered from Sweden - it is essentially, as she describes it, like a gym for the cells - it's a small surgical steel device that expands and contracts the cells once they've differentiated into their elongated form. This cellular exercise will make them stronger and she hopes, will cause them to align in the same direction with each other in order to reproduce muscle tissue that is similar to what grows in vivo (in a body).
I'll also be working with another energy worker/hypnotherapist from Montreal as well, but not on these particular Mighty Mouse cultures. I'm looking forward to seeing what results.

Now to unpack the cell passage process a little bit: cells grow in a monolayer on the bottom of the vessel (pitre dish, etc). They are firmly attached to the vessel and will continue to grow until they cover the entire bottom - this is called confluence. At this time, they will either stop growing or die. So, we don't let them cover the bottom entirely, but instead do the cell passage process to divide them up into more vessels, to keep growing. Or, they go into the freezer to suspend growth until they are required for more experiments. As you can see in the first part of the cell passage protocol, we do the passage when they are about 60% confluent. They begin to differentiate at about 80% confluence, meaning they change into another cell stage. We need to passage them before then.

PBS is phosphate-buffered saline, a solution that cells like because it's got the right amount of salt. This is used to give them a cleanse prior to separating them from the bottom of the dish. They must be cleansed of all cell medium (which is the blood serum + antibiotics that keep cells alive in their culture dishes) because the cell medium, called DMEM, will neutralize the Trypsin and it won't work. Trypsin is like a soap that essentially begins to break down the cell wall, so it is used to separate them, but only for a minute so that they don't become mortally wounded. Just think: every time you wash your hands, you are removing a cell layer. After a minute, the cells are floating around in the solution freely and can be pipetted into new vials and once more have space enough to grow. After they are in their new cell condos, they can be fed again with the cell medium (DMEM), which neutralizes the Trypsin and helps them recover from the stress. They are then returned to the incubator, which keeps them at body temperature, and begin their growth process anew.

The Mighty Mouse cultures at home in the incubator.
When Amber is ready to do her energy work on the Mighty Mouse cultures this coming Friday morning, they will be cozy in the incubator, well fed and ready to receive good energy. Then I'll look at them again under the microscope and see if I can determine what difference she might have made.

Also, in the next few days or week, I will be doing bone decalcification/decelluarization with Dr Mary Lee. This is extremely exciting. She will help me remove all of the calcium crystals from the bone extracellular matrix and then we will fill it with wax, slice it with the bone saw, dye it beautiful colours and then photograph it under a  microscope. Oh, and one final interesting thing to add: bone cells don't become confluent! They can grow while floating in suspension and do not adhere to the wall of a dish. Why? Because they are magical.

Tuesday, May 6, 2014

making bone soup (lab recipe) + ghost organs

For the first part of my process of growing pre-designed sculptural bone, here's what I'll be working on this week at SymbioticA: 1) Making bone soup and; 2) decellularization.

The 'bone soup' is the very particular chemical formula required for specific bone cells to grow once they have been either 
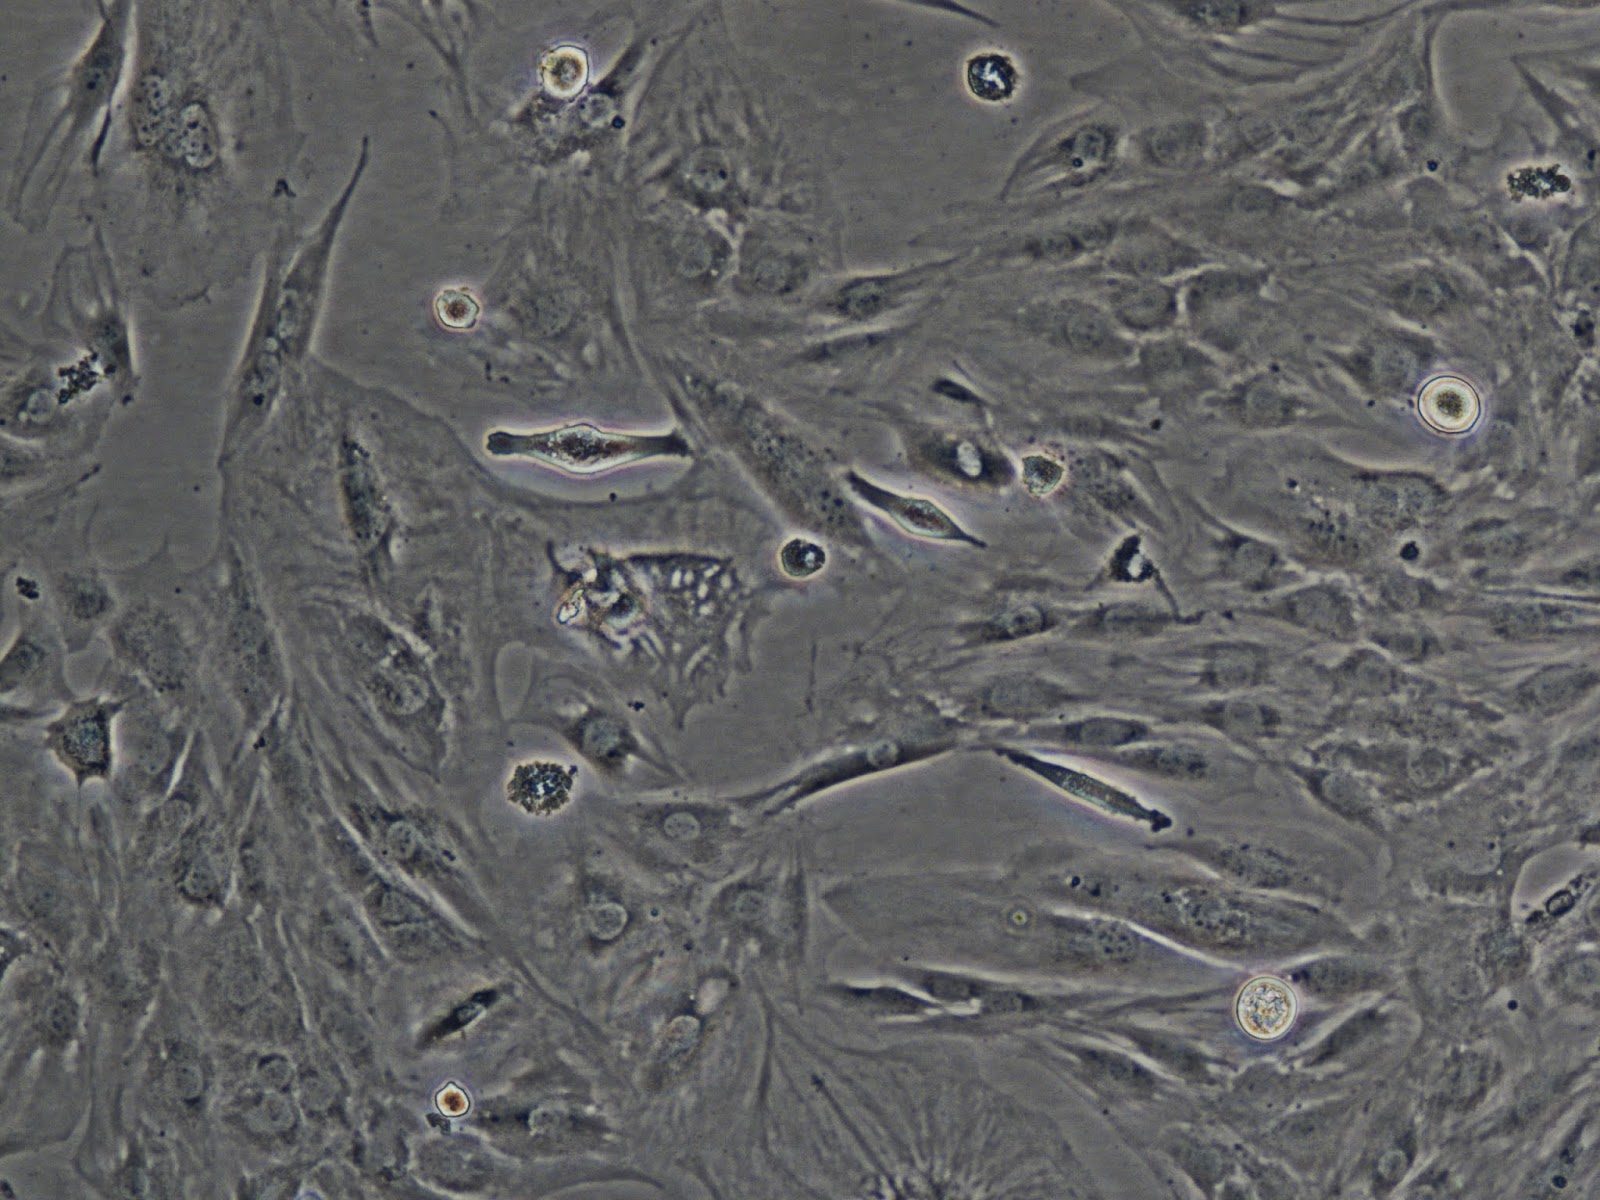
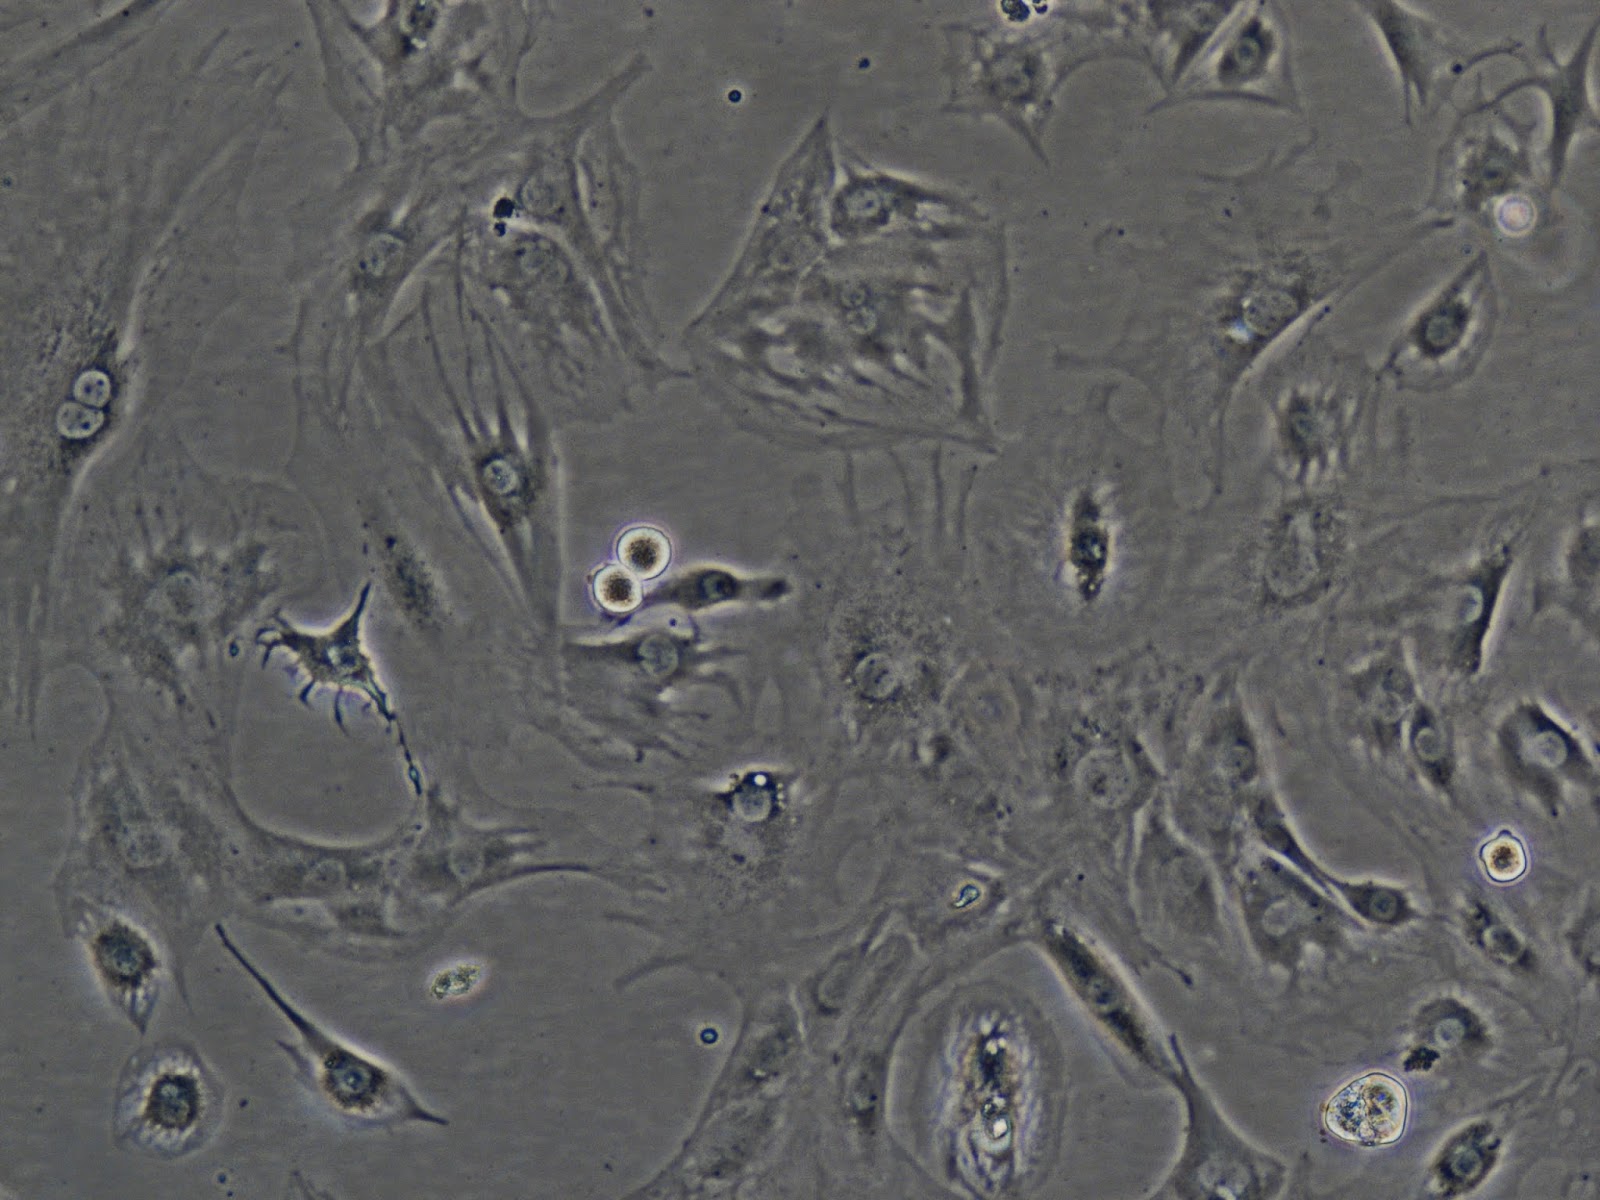
purchased as cell lines, or isolated from a bone sample and/or differentiated into the types I want to work with. There are different types of bone cells, but I want to work with osteoblasts and osteoclasts, the cells that both chew up (destroy) and build, or rebuild bone matter in a symbiotic process. I've transcribed the Bone Soup Recipe further below. It is not lost on me that my lab work, making bone soup, is a fun metaphor for what happens in my kitchen at home. The fact is, DIYBio (do-it-yourself biology) is a growing BioArt movement that sees kitchen labs happening all over the world. At MY home, I just make bone broths to eat for good health. Anyway, I enjoy the metaphor and the witchiness of making bone soup in the lab.

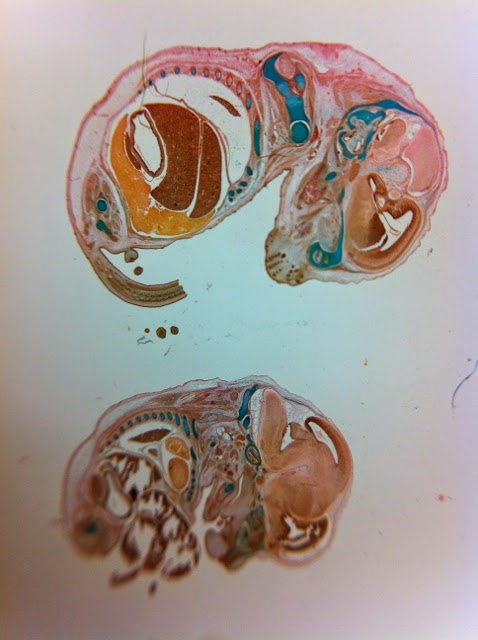
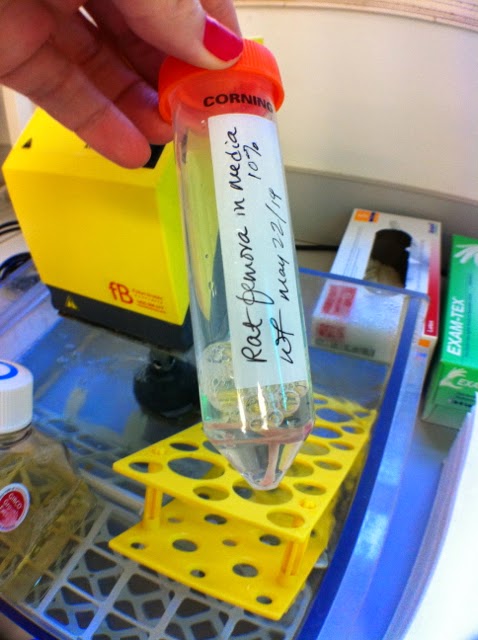
I'll be visiting a butcher either later today or tomorrow to purchase some tissue and organs for decellularizing, and perhaps later in the week, going back for some freshest of fresh bone, once the bone soup is ready. Fresh, unfrozen bone contains living bone cells for a short period of time, and they can be extracted for lab use. The organs and bones will all be animal (nonhuman) samples for now but there is the potential for extracting and working with human bone cells here at UWA after an ethics approval has been obtained. That is currently in process via a UWA biologist who is interested in doing this, and who I may have the chance to work with. I may also have a chance to visit and observe the morgue and all of the human cadaver specimens this week, or next. The morgue is just downstairs from the SymbioticA office. There is an atmosphere of deep respect for everyone who has donated their bodies to science, here at the School of Anatomy & Human Biology.


Decellularization is the process of removing all cells from the tissue extracellular matrix, or the elastic-like webbing that forms the underlying structure of all animal tissue (collagen). I'm decellularizing muscle tissue (like steak) and small organs (like a chicken heart) to be left with collagen strands that I can then manipulate by hand under a microscope, into small textile-based sculptural forms. The heart, I will just use to make a ghost organ because they are beautiful, white and see thru structures in the shape of the original organ. The new scaffolding I create will then be enculturated with my new bone cell cultures, meaning I'm essentially making a collagen trellis for my new bone cell babies to grow up on and take the shape of. I also caught wind of a biologist who is decellularizing bone, Dr Mary Lee, and I meet with her tomorrow. If she'll share her protocols with me, I can do some bone decellularizing, too, meaning create transparent bone webs, I think. I'll know more about that process after we meet tomorrow. It may be that after I decellularize bone, I can manipulate that matrix more effectively than muscle tissue matrix - I don't know yet, but it's a hunch.

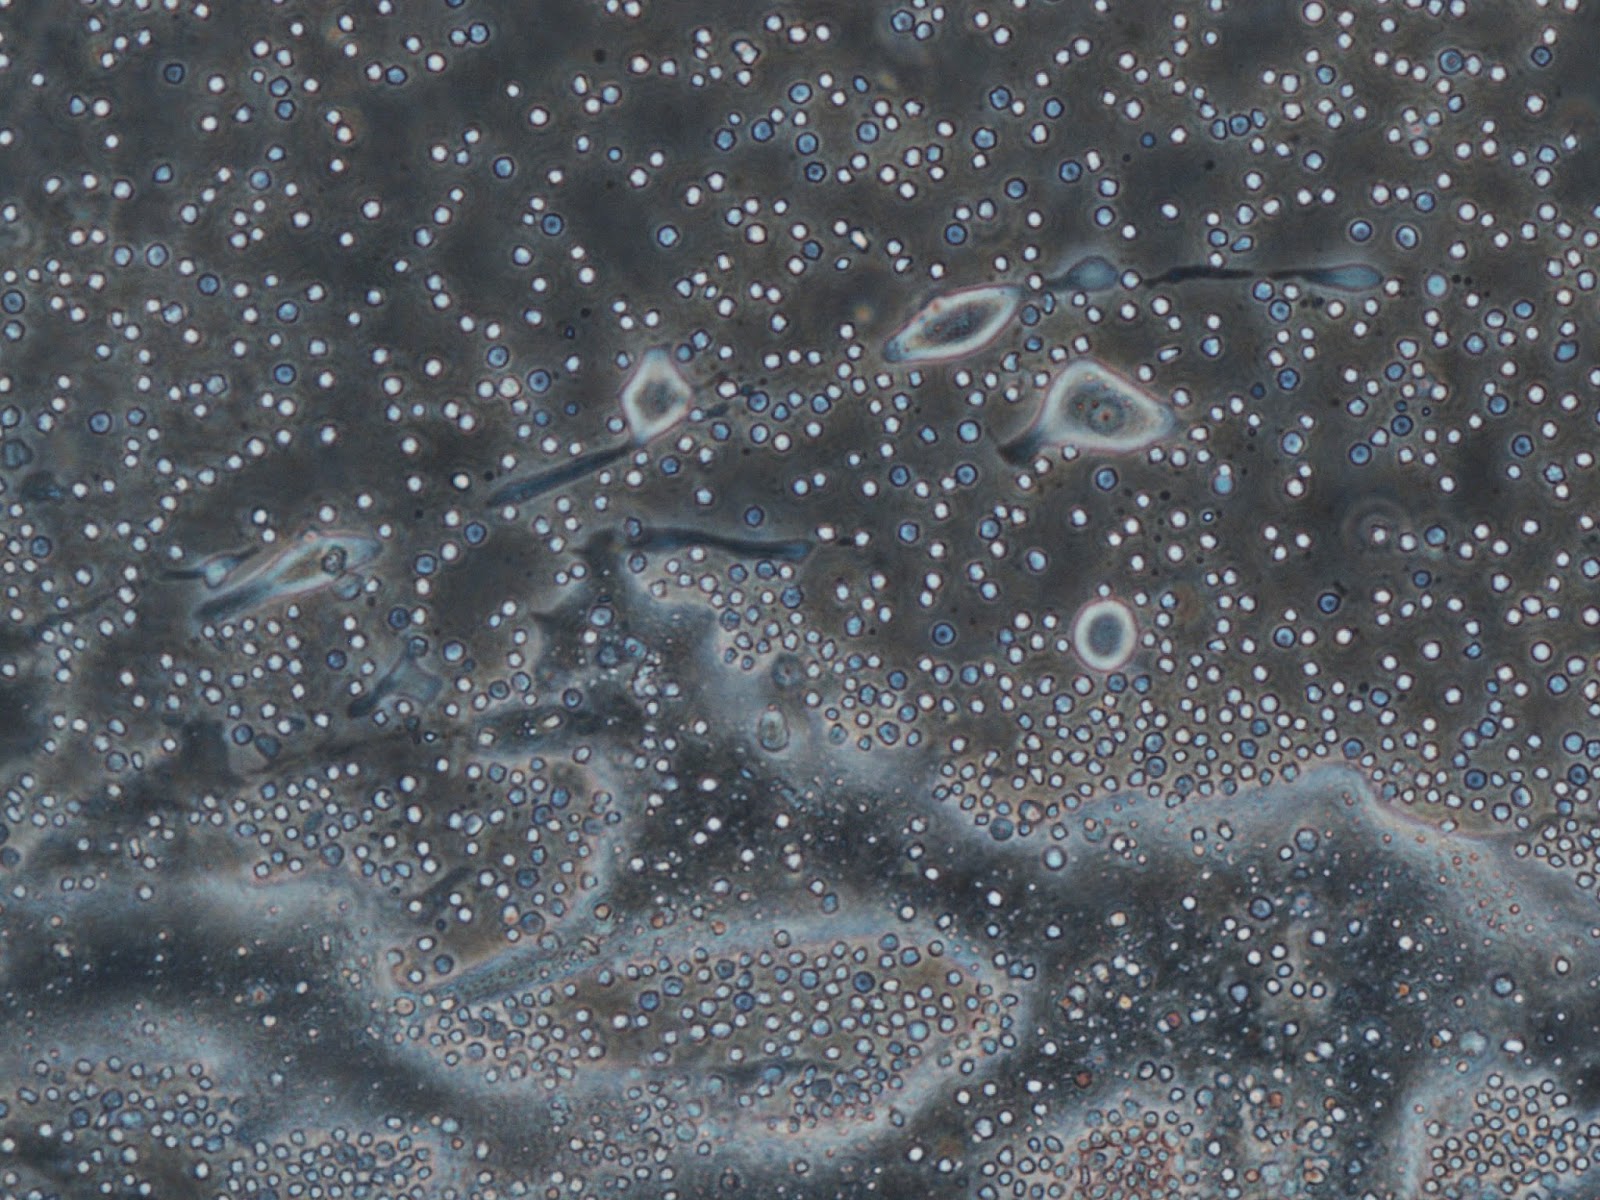
Another artist/biologist I was able to meet with today is named Guy Ben-Ary, who is in charge of the  microscopes and imaging in the labs. With his help, I'll be able to shoot HD video of my live cell cultures in action, squirming and growing, as well as capture high res images or videos of my hands working under the microscope to manipulate the collagen (once I have it). Also, this week I'll be watching a PhD student do the process of bone cell differentiation, which means coaxing cells to become one type or another depending on the chemicals you bathe them in. This is a process I will also have to do in my bone tissue culture work, so this is my chance to watch and learn. Very exciting. I'll post another update on the weekend to share what I was able to achieve with the bone soup and the decellularization.

Here is some technical information regarding the process (below), including the bone soup recipe:

FIRST,
Understanding basic molecular units:

1 Mole [Molar] = 10[27] = No. of molecules/L

mM = milliMolar
µM = microMolar

1/1000 = 1mM = 1 x 10[-3] M
1/1,000,000 = 1µM = 1 x 10[-6] M

MW (molecular weight) or
FM (formula weight)

MW Ascorbic acid (cell culture grade) = 176.12g
So, 176.12g/L = 1M

NOW,
Bone Soup Recipe (Osteoblast): ---> Osteoclasts will require separate recipe
  • 500mL α-DMEM
  • 10% FBS
  • 1% Penicillin-Streptomycin
  • 0.2mM Ascorbic acid
  • 1mM ß GP (for mineralization only)
  • 10nM dexamethasone
Coat dish with media and FBS, put in incubator for 20 mins and wash.

For later - FIX methods:
  • 4% Paraphormaldehyde
  • Methanol 20 mins in -20
In order to get 0.2 (1/5) mM Ascorbic acid, make STOCK SOLUTION:
>  if 176.12g/L = 1M
>  then 1.76G/10mL = 1M
>  and 0.00176g/10mL = 1mM (1/1000 M)
>  so, 1/5 of 1mM = 0.2mM

*Thank you to Dr Stuart Hodgetts, Assoc. Professor, Spinal Cord Repair Laboratory, Experimental and Regenerative Neurosciences at the School of Anatomy and Human Biology, University of Western Australia for helping me with these calculations and for future assistance in providing chemicals, equipment and guidance for making the bone soup. Also, for lending me these two books:
Carleton, H. M. Histological Technique for Normal and Pathological Tissues and the Identification of Parasites (3rd ed.). Oxford University Press: London. 1957.
Hall, Brian K. Developmental and Cellular Skeletal Biology. Academic Press: NY. 1978.

*Thank you to Ionat Zurr, Assistant Professor, SymbioticA, School of Anatomy and Human Biology for the Bone Soup recipe (taken from Visconti Lab, Dept of Veterinary and Animal Sciences, UMassAmherst, Boston, Massachusetts) and for introductions to helpful biologists.

Wish me luck with my bone soup making! It has to be inconceivably precise.